

I have recently encountered a number of cases where people thought that they had backed up data from their machines by dutifully writing it onto a CD-ROM. Image their horror when they inserted the CD-ROM that supposedly contained their data into their CD-ROM drive, only to be confronted with the dialog box in Figure 1. For some reason or other nothing had been written to the CD-R disc. The remainder of this article describes the protocol that Macintosh computer users need to follow in order to avoid such tragedies. Conversations with friends reveal that a lot of people have had this experience, but that they learned from it quickly enough to avoid serious consequences.
While copying data onto a writable CD-ROM disc (known as a CD-R) is a straightforward process, it is not trivial. Apple's software design fails to properly coach the end user at a crucial point in the process, virtually inviting the operator error that gives rise to the problem of the failed backup. Let's take a step-by-step look at the process of backing data up onto a CD-ROM so that we can clear up any misunderstandings and achieve reliable results.
The illustrations in this article focus on Mac OS X. I think that CD burning employing the Finder was introduced in Mac OS 9, but I made little use of it in those days because media like Zip cartridges were easier to use and adequate for my purposes. CD burners were expensive and bulky add-on items back in those days. At that time it would take months of work to generate 650 megabytes of data. Mac OS 9 now provides much of the same convenience in backing up to optical media that Mac OS X does, so Mac OS 9 users can benefit from this discussion.
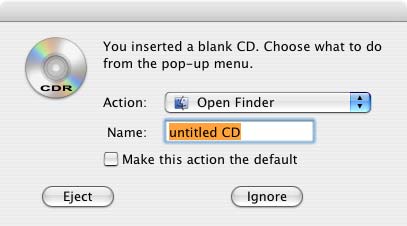
Figure 1
Figure 1 shows the computer's response when a blank CD-R is inserted into the drive. Back in the days when floppy discs came from the manufacturer in an unformatted state we got a very similar message. This signaled that we needed to "format" the disc. A directory structure was written to the disc and tracks were laid down to store the data that would soon be written onto the disc by the magnetic head of the disk drive. Those of you who are able to use DVD-R discs for backup can simply substitute that abbreviation for CD-R anywhere in this article.
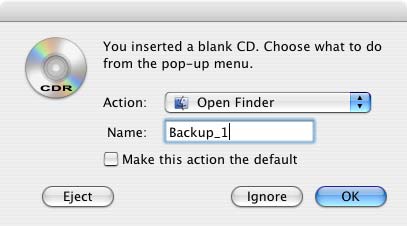
Figure 2
So, we would type a name like "Backup_1" into the name field, as shown in Figure 2, and click on OK. In later times floppy discs, Zip discs, and other removable storage media came already formatted with a name like "untitled," a practice that continues to the present day. These media are ready to receive data as soon as they are connected to the computer. Renaming them is a simple matter of typing a suitable name into the right place.
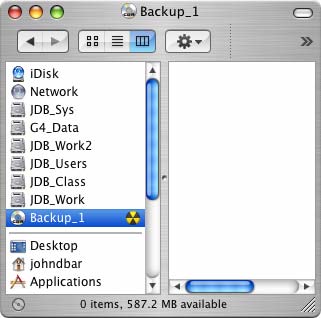
Figure 3
After we dismiss the dialog box in Figure 2 by clicking on OK we see that a new icon appears in the Finder window (Figure 3) and on the desktop (Figure 4). This is where the problem starts. These icons look, for the most part, like icons from any other writable storage media. The shiny CD appearance is familiar to us from the occasions we put a commercial CD into the machine. The little circle with the black and yellow triangles is analogous to the radiation hazard symbol that one sees in nuclear installations. Perhaps this is meant to tell us that there is something sinister here.

Figure 4
The disc appears to be ready to receive data and indeed we can happily drag folders and files onto the icon. When we do so we see a dialog box like the one in Figure 5 telling us that files are being "copied" to the disc. This is the same dialog that we would see if we were copying files from one place to another on our hard drive. I find this to be deceptive labeling. The files are not actually being copied; they are merely being made ready for copying. I'm not exactly sure what the exact procedure is and it is not really important.
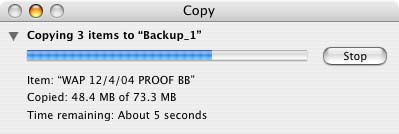
Figure 5
The important fact is that any folders or files “moved” to the CD-R are only "virtual" at this stage of the game. If the user ejects the CD-R it will come out as pristine as the day it left the factory and all of the virtual files will fly off into Never-Never Land. This is, in my humble opinion, a serious design flaw. There should be an alert to the user asking "Are you sure that you want to abort backing up the files to..?"
![]()
Figure 6
The final step in capturing these files onto the CD is called "burning." The name arises because a tiny laser beam changes the physical state of a dye that is embedded in the disc. On a CD-R this change of state is irreversible, so these are "write-once" media. CD-RW media can supposedly be erased and rewritten, but most of us have gotten turned off by past failures in using these media. The "burn" can be invoked from the Finder's File menu, from the burn icon in the Finder window (Figure 6), or from a contextual menu invoked by right-clicking the desktop icon for the optical disc. You will be prompted for your concurrence by a dialog like the one in Figure 7.
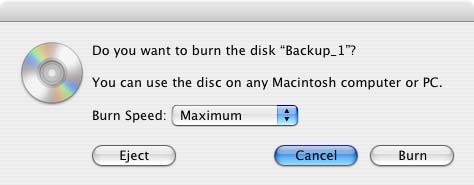
Figure 7
Be sure to select the "Burn" choice. Selecting "Eject" at this point consigns your carefully selected archive to Never-Never Land, never to be seen again.
Burning takes quite a while because the laser has to put quite a lot of heat into the place where the phase change has to take place. A dialog like the one in Figure 8 will appear while the burn is going on. Once the burn is complete the user can decide whether or not to verify the result of the burn. It is a good idea to let the verification take place.
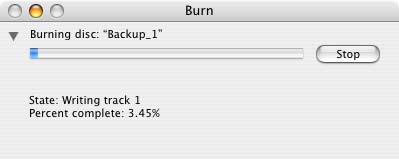
Figure 8
OK, so the disc has been burned. Is this a signal to stash it away and wait for the day when you need to restore data? Definitely not. The very first thing one should do with a backup medium of any kind is to try to read it. If this step fails you need to redo the backup, and the sooner the better! The fastest, though not the most thorough, method of checking the disc is to re-insert the freshly-burned CD and see if there is anything on it. Dantz Development's Retrospect software product compares the backup set with its source files to ensure the integrity of a backup. Some people find this product too expensive and too cumbersome, but other products do not do as thorough a job.
Once the integrity of the backup is verified, it is time to get a good night of peaceful sleep, uninterrupted by worries about one's data.
Optical media are attractive because they are cheap and relatively durable. I have presented an approach that does not require any add-on software in the hope that more people will take the trouble to learn how to back things up properly. There are more robust and more automatic procedures that can be used to good effect. An investment in a sound backup product will pay for itself in the long run.
Every computer user should remember the following axiom - "Sooner or later you are going to lose data. The only question is how soon and how much." By taking proper precautions you can delay the day of reckoning and keep the loss to a minimum.