|
|
Struggle or Enjoyment? A Review of Adobe Pagemill 2.0 and Adobe Premiere 4.2 |
|
This is one of a series of articles with an added focus of exploring various ways of learning a new software program.
Because of the nature of my business as a computer graphics artist, my triple Gemini totally curious nature, and my desire to find a job I enjoy, I have taken it on to learn many, many software programs. Yet, I still feel that I struggle to learn a new one: Adobe Pagemill 2.0 has been my latest nightmare! (oops… until I just bought Microsoft FrontPage, that is <G>) Many of you share my reluctance to read software manuals; but software has gotten so sophisticated that reading the manual seems to be more of a necessity nowadays. So with a good spirit, I read the Ptutorial. Yet again, when it came time to begin my own first project, I couldn’t solve my problems when I looked in the manual, or when I skimmed the second party book, Pagemill for Macintosh: Visual Quickstart Guide3, by Maria Langer. This past three months, I struggled to create and upload four websites.4 I assume some of you readers also might be intimidated to learn new software, as I seem to be, and I decided that I will begin to explore different approaches to learning software.
I just decided I wanted learning computer software to be more enjoyable and less of a struggle for me. So I decided with Adobe Premiere 4.2, to try a different approach, and so after reading the manual, I invited the infamous Stuart Bonwit of TCS and WAP Journal notoriety to visit me and give me an introductory tour of Premiere. This article presents a contrast between the struggles of learning Pagemill on my own&endash;and creating my first four websites, versus my beginner trials with Premiere from that experience with Stuart.
I was very enthusiastic to buy and use this program. I love Adobe products. Pagemill is only $99, and it offered the ease of creating webpages without learning html coding. I was not intimidated by html, since the concept of codes before and after a item or paragraph was similar to the "reveal codes" feature of WordPerfect 5. But the HTML books all seem to be a dense 500 pages, and learning to create a website was not a primary goal of mine; I just wanted it to be quick and sweet, so I could go on to learn Macromedia Director 6. I did the Pagemill tutorial: text was easy: typing it, changing sizes, justification, color. Bringing in the gif background pattern (that I had created in Adobe Photoshop 4, and exported as a little gif89a file to make the file size tiny) was easy and gratifying to see. I understood that it is very important to set up a local root folder for your HTML pages and inside that folder, you want to set up another folder with your images. The manual didn’t really make clear the naming of folders; I thought it had to be called, "local root folder." I understood (sort of) that you don’t want to move that folder or its contents, because it destroys the links. But I did later get into many hours of trouble because I used the Macintosh ability of putting spaces before the name of the folder " images" instead of "images" to make that folder sit at the top of the list alphabetically. Well, those spaces put a "%20" into the HTML coding in front of every image name, and it took a long time (emphasize the word long!) to understand why the images weren’t loading at the website.
What I don’t like about Pagemill
Linking: I found it very difficult to understand the creation and management of links to and from pages. I still don’t really understand it, and have gone over the manual repeatedly. At the bottom of the webpage window there is a little red circular target for establishing links, but I don’t feel there was an adequate clear explanation of how to use it in the manual. Microsoft FrontPage has another linking system that looks easier until you try to rename a page or delete or fix a broken link. They didn’t bother to include how to edit links in the Manual, only that you could! But then I did find some guidance in the software help feature for FrontPage. Perhaps Pagemill has software help that is more detailed than its Manual…
I really have been enjoying the interactive tutorials that are being packaged on the CD-ROM of the softwares nowadays, that teach you visually how to use a new technique. This would have been real helpful teaching "linking," which is not really difficult, but for a beginner, I hadn’t a clue as to how much linking was enough or too much or what was needed to link a page back. I stumbled for hours over what to do with my already-established links if/when I changed something else on one of the pages&emdash;did I have to re-establish the links? …all of them in both directions?
Frames: Pagemill seems to be very frame-based, which is frowned-upon by the industry, since many older browsers can’t recognize frames at all. The tutorial itself required frames; which means that Adobe chose to teach you your basic webpage construction via frames. I like frames.
Design choices/Templates: How do I make my webpages look like the modern ones that corporations are now using? There weren’t examples of possible kinds of looks for pages. Various examples, and how to construct them in Pagemill, would have been most helpful. I saw a friend’s site; he had used FrontPage to create it; FrontPage has templates of designs for your page, as well as clip art for the little labels and link-words you will need. Pagemill doesn’t have clip art or templates; I looked at the www.adobe.com website under Pagemill, but there weren’t templates or clipart there either. (Note: Well now that I have begun to learn FrontPage, and watched someone creating a website at a job I temped at, I see that the clue to good layout/design of your page is to create the whole page as a table with cells, fitting the graphics and text into the cells…)
Link text: I found it difficult to understand about link text colors. It seems you need to set up your preferences file before opening your work; but does that work for each HTML file, and exactly how… duh? I sure wind up feeling stupid, reading the manual over and over, and not understanding the procedure.
Inspector Palette: The use of this palette is not self-explanatory, and I didn’t find the manual clear in teaching its use. Is a computer software manual’s purpose to teach you how to use the program, or merely to describe the program?
1st Generation, 2nd Generation, and 3rd Generation Websites
I semi-completed my first site (http://members.aol.com/friendstpk), and then read the fantastic, advanced-level book, "Killer Websites," by David Siegel.
I was embarrassed by my site! Mr. Siegel talks about 1st generation, 2nd generation, and 3rd generation websites.
First generation sites have text on a grey background, horizontal lines dividing sections, and usually the site is one vertically long, never-ending site that you scroll down and down.
Second generation sites usually have some exciting background pattern, that all too often makes the text extremely uncomfortable to read. They use many bells and whistles to make a site look like the designer knew a lot about creating websites, but often they are more decorative than functional. They often are excruciating slow to load, (I personally leave a site if I have to wait more than 2 minutes… and 2 min is generous!).
Third generation sites are quicker-loading, easy on the eye, well-designed to move the reader to where you want them to look. You shouldn’t have to scroll down a lot. Design and color shouldn’t get in the way of text-readability. I think my fourth site is approaching that: http://members.aol.com/etana
Because of all the trouble I had figuring out how to fix a problem I was having in Pagemill, I finally decided to have a friend come visit and teach me a little HTML coding. He brought over the cartoon-illustrated book, Creating Web Pages, Simplified, an IDG 3-D Visual Series book from MaranGraphics. This book is almost embarassingly simple, but I was able to get through 135 of the 225 pages in a couple of days. There is much to be said for choosing the simpler way. This book is mostly a picture-book, with a window of HTML coding and just to the right of it, the same window with how it looks in the web browser.
Many software programs can be successfully used and enjoyed by the beginner, the hobbyist and the professional alike. My goal at this point is not to master desktop video editing; but rather, to learn a rudimentary use of the software, so that I can bring little movie clips and simple animations onto my webpages, and also into Director, the program I really want to spend some time learning in depth. I am limited by hardware: I have only 160meg clear harddrive space on my 7100/80AV Powermac with 48meg RAM. But, since I will be outputting for the web and into Director, the clips need to be little anyway.
Adobe Premiere’s advertising boasts that it enables one to "create high-quality QuickTime digital movies and videotapes…" on your Mac "…editing for television, creating sales and training videos, or building footage for multimedia presentations… And when you’ve finished, produce your movies for small- or full-screen viewing; even export them to tape…" Doesn’t all this sound like fun!
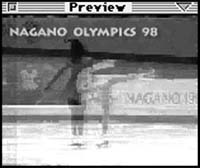
Stuart arrived, I hooked up the cable from my VCR to the AV S-in port of my 7100AV, launched Premiere, and opened a new document. And I couldn’t capture the video onto my Mac. Here’s the first point of being lost and alone at my desktop :-( … Stuart to the rescue! He had me shut down the Mac, plug in the connections, and restart the Mac, and re-launch Premiere, and open a new project. Voila! There on my desktop was the Nagano Olympic performance of Lu Chen from China which I had taped during the Olympics! It is very exciting to see your television monitor appearing right on your Macintosh desktop!
Beginning Steps in Premiere
I will try to reproduce how Stuart guided me in my first project, in case some of you might like to replicate it. However, I understand so little of video capture into the Mac, that you are encouraged to got to the invaluable Washington Apple Pi electronic bulletin board (TCS), Conference 3 Mac, Board 20 Multimedia, for specific help in your situation.
The days after Stuart's visit, I went back to the two CD-ROMs included with Premiere, and began to view the multimedia demonstrations, tips and tutorials. They do not seem nearly as intimidating! As a result of Stuart's evening of mentoring, I feel I am familiar with the environment of Premiere, and know how to begin a project, bring in sound and text, play with transitions of film clips, sound volume and text fades. By its nature, computer work is a solitary endeavor, but from this experience I encourage you not to isolate yourselves when learning software...reach out for mentor/s.
1. Open File: New Project, which brings up the window with suggested 160x120 presentation. I selected this small project due to my Mac's memory constraints. This brings up 6 Premiere windows:Construction window:
Controller window:
Commands:
Project: untitled window:
Preview window:
Info window:
Notice that the Construction window has 2 sections: video and audio, and that horizontally it moves through time, measured in seconds. The video track is further divided into video tracks A and B, a transition track labelled T, and a text track, labelled S1. There are also two tracks for audio, A and B, as well as an audio transition track X1. At the top of the Construction window, there is a bright yellow horizontal bar, bordered by 2 red triangles. This delineates the section that will preview, so make sure you drag it horizontally to match the length of clips that you want to view. Premiere has a lot of drag and drop features which are satisfying to use.
So now, my 7100av is connected to the video port of my VCR.
2. The next thing you want to do is bring video, audio, and possibly text files into the project.(On the Premiere CD #1, there is a folder called, "Third Party Clips," with sample video, sound, and image files). Your imported movie-clips and sounds show up right into the Project Window; then you can drag them into the appropriate channel of the Construction Window.3. File > Capture > Movie Capture …and I see the TV image flowing on my Mac monitor. It is pretty humbling and thrilling!
4. Click Record; to start the recording; click mouse to stop recording.
6. File > Import the movie capture. It will appear in the project window.
7. TEXT: To enter text, choose File > New > Title. The text window appears, and with it, the Premiere Program Menu Bar changes to include the text options of Title (style, size, etc.) and Font. Choose the Text icon in the toolbox which you now see, since you are in the text window. Type some text. Within the text window are two color boxes: the foreground text color and the shadow color. Clicking on each of these brings the Apple system colors. Clicking on the bottommost box of the Text-toolbox is where you can adjust the text shadow. Play with it; it is intuitive.
Once again, to use the text you will have to save it, and then import it, just as you did with the movie clip. The text will import into the Project window also, and then you can drag it into the S1 window.
You probably will want to make the text background appear transparent above the movie. Click on the text in the Construction Window to select it, and then in the Menu, you can select: Clip > Transparancy > white alpha matte.
8. Note: When you want to adjust the options of a window, make that the active window by single-clicking the mouse on it, and then in the Menu bar, Windows will show that window’s options as the first item.
9. Preview: So now you have a movie clip and a title clip in the construction window. Remember to drag the bright yellow horizontal bar mentioned in (1) so that it matches the length of what you want to view. Now, just hit Return to preview the movie. You will be asked to save again; then the preview will assemble what it needs, and finally will preview for you. If your file/window is small it will take about a minute. Anytime you change anything, a new preview will build before you can see it.
This is only the beginning. You can add transitions and sound. You can trim the clips. Stuart showed me how easily you can change the visibility of the text. I like when an artistic tool can be used by both amateurs and professionals successfully. I think Adobe Premiere is like that. With a little kick-start from a friend, it seems that you can easily make a Premiere movie!
1. Read the manual
2. Do the tutorial
3. Reach out to WAP folks on the TCS and via the WAP Journal hotline pages, or another friend who already knows the software. See if someone might want to help you out with a few hours’ visit. They probably will get something out of the visit, too. The friendships are enjoyable; there is plenty of computer talk to share, and learning goes both ways. Perhaps someone wouldn’t mind talking with you on the telephone for 20 minutes a few times. I think a guided overview of the program from another person is invaluable. Learning Pagemill by myself, alone, was just a very frustrating experience, and I have isolated myself learning many other programs. It is unnecessary. A brief visit will unlock many of the hidden features that the manual just does not seem able to clarify. After the visit, spend more time with the program and another review of the manual. Then when you have questions, you at least know the language to ask. Then you can pose more questions, either to the TCS members, or the hotline people. Stuart’s visit just made me immediately familiar with the territory of Premiere; I did not get this from the manual: I saw the windows, but didn’t know how to connect them.
4. Take one of the WAP tutorial classes at the Pi office if possible.
5. If the software has multimedia tutorial demos on the CD, that is terrific! Director has fantastic tutorials and demos (perhaps because that’s the purpose of the Director software! …A review of Director for the Pi Journal is my next project… oops, got waylaid since I had to learn FrontPage…
6. Play with what the program is, not what you want it to be, or what you want to happen. (And I am just beginning this approach…) Instead of finishing the tutorial, and then moving right in with a complex project you have planned out in some detail, just play around with the program. This might make it easier for you. Bump into things. Pull down the menus and try what beckons you! Try silly, or clumsy, or ugly things. Make mistakes. Especially in art software, creativity can come out of the exploration that generates "mistakes," and if you are having fun, instead of being intimidated, you may use the software for further projects. When I planned that first website, I had such big visions, that each time I couldn’t do something, I would struggle, forcing myself to find out how to accomplish it, alone. I am really tired of that approach, always hitting into brick walls. There definitely is challenge involved with learning new sortware, but we mustn’t substitute pressure for excitement when taking on a new challenge.
I offer to you readers who share my frustrations in learning new software, that you don’t isolate yourself, but rather, reach out to the Washington Apple Pi community and share in friendship and education.

![]()
Revised Saturday, August 12, 1998 Lawrence I.
Charters
Washington Apple Pi
URL: http://www.wap.org/journal/