

I made my first “switch” about two years ago when I installed RedHat Linux on my PC. Linux is great, and I really enjoyed working with it, but I needed to upgrade my old 200Mhz PC for something more modern. I didn’t want to use Microsoft XP but I needed to be able to run kids’ games, which led me to the Mac. Here was a system that is a UNIX variant (Mac OS X is based on FreeBSD, a free UNIX implementation) that also has a decent range of games for kids (and me). I bought my first modern Mac (eMac G4/800) in December, and then I bought my iBook in March. (Did I mention that my wife loves the eMac?) One of the added bonuses of Mac OS X for old Linux users, as well as old Mac users who want access to a new area of applications is something called Project Fink. Fink allows users to install and run applications originally designed for Linux, including applications that use the X11 graphical interface – not just command line programs!
The fink project was started by Christoph Pfisterer in December 2000 as a way to facilitate the use of Linux applications on Mac OS X. Fink uses the Debian Advanced Package Tool (APT) as the means of managing (installing, upgrading, removing) fink applications. The beauty of APT is that it recursively resolves dependencies – the bane of the Linux world. Simply put, an application may require another application to be installed for it to function. For example, if an application requires a certain graphics toolkit to function, then fink will also download and install the toolkit if it isn’t already installed. Without APT, a user may spend a lot of time tracking down and installing dependent packages, particularly libraries. Fink simplifies all of this with the end result being a system that is easy for a user, even a non-UNIX geek to use.
Installation is straightforward. Simply go to the fink Web site (http://www.fink.sourceforge.net) and download the current version (0.6.2). You install it like any other application. The major difference in how it installs is that it creates a new directory, /sw. Fink will then install any fink applications into this directory, so if you decide that fink isn’t for you all that you need to do is delete the /sw directory and it’s gone.
The next application that I would recommend is Apple’s X11 (http://www.apple.com/macosx/x11). X11 is the Linux equivalent of Aqua – it’s the graphics engine for graphical applications. I say recommend because you can also install this as a fink application, but the Apple package is easy to install and gets good reviews on the Web sites and mailing lists that I’ve seen. Once this is installed you will need to make sure that fink can use it. To do this you run “fink install system-xfree86”. After you do this you are ready to use X11 applications. (Editor’s note: X11 is an optional install in Mac OS X 10.3, on the third disc in the set.)
One last application that I would recommend is FinkCommander (http://finkcommander.sourceforge.net). FinkCommander is a graphical user interface (GUI) for fink. It provides a simple interface for maintaining fink, as well as installing and removing fink packages.

Figure 1. FinkCommander
That does it – you’re now ready to install some fink applications and enjoy the wonders of X11!
The Command Line
While FinkCommander is a great way to maintain your fink packages, the command line method is fairly simple. To install a fink package from the command line you need to be connected to the Internet and have a terminal open. You also need to know the name of the package that you want to install. For example, you may want to install AbiWord, a great word processor. Simply type “fink install abiword” hit enter, and it will go to the fink Web site, determine what additional packages GIMP requires, and you’ll see something like that shown in Figure 2.
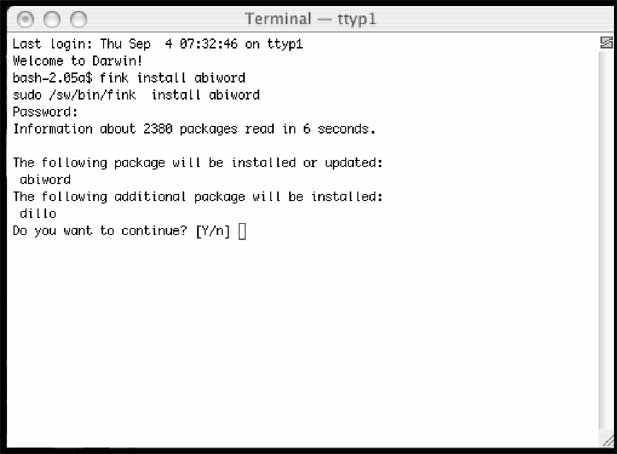
Figure 2. Installing a package from the command line
Fink will prompt you for your password, then scans installed packages, and then tells you what additional packages are needed. In this example, fink needs to install dillo, a lightweight browser to meet the dependencies of AbiWord. Note that the additional packages required would vary depending on what you already have installed. Assuming you select yes, it will retrieve and install the packages.
FinkCommander (GUI)
FinkCommander provides the same functionality as the command line, but in a nice graphical package. You can choose to install applications from source code or binary packages. From what I can tell, the binaries that are compiled for Macs perform about as well as the applications that you compile from source, so go ahead and use the smaller binaries if you want. The only downside to binary packages is that they may be older than the source code versions. For example, a package may be available as source at version 12.3, where the binary version is at 11.5. Figures 3 and 4 show the installation process for AbiWord in FinkCommander. I have just selected to install from source and am asked to enter my password:
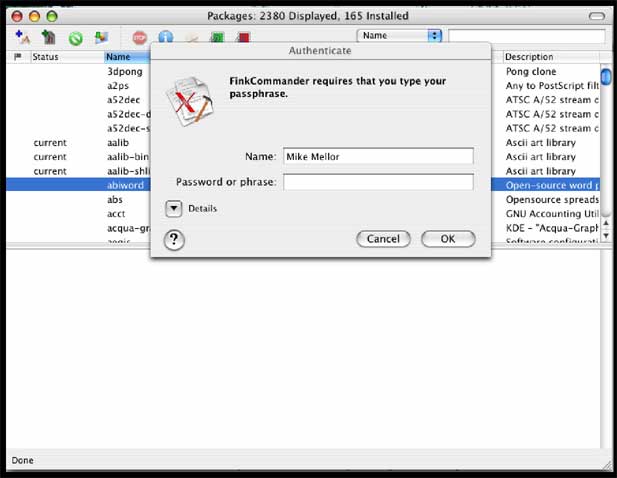
Figure 3. FinkCommander password prompt
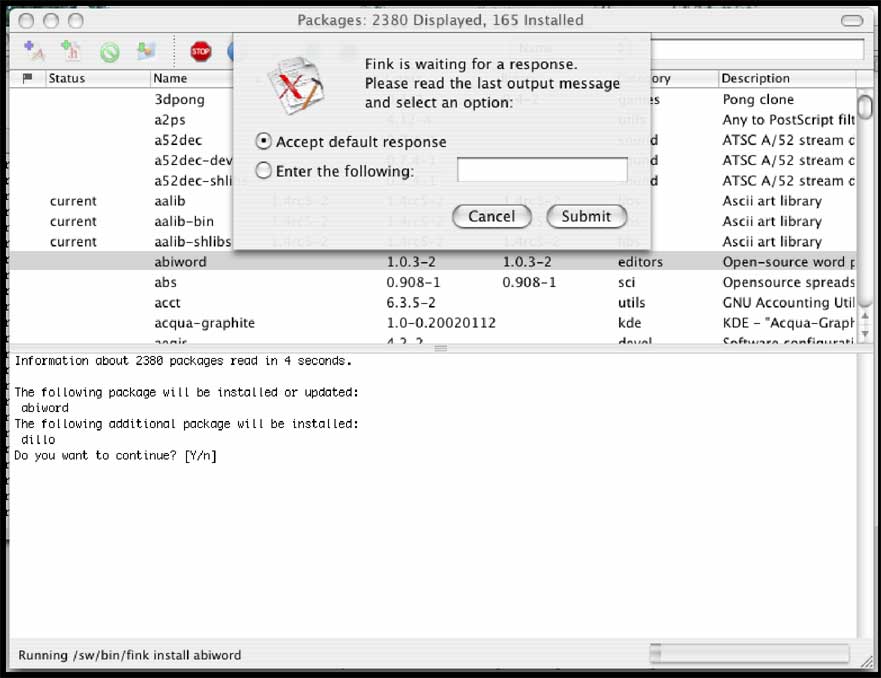
Figure 4. FinkCommander identifies dependent packages
Note that the packages listed for install by FinkCommander are exactly the same as fink from the command line!
Now, here are some applications that I enjoy using through fink. If none of these look interesting to you there are thousands of other packages available at the fink Web site (or listed in FinkCommander).
Gnu Image Manipulation Program (GIMP). GIMP is an image editor that is similar to Photoshop. It handles a huge number of image formats (TIFF, GIF, XPM, etc.) and has a great tool set. One of the things that I really like about GIMP is the ability for users (real power users, not me) to create scripts to automate some incredible tasks. There are a whole series of scripts to create buttons and logos that can be used in Web pages or anywhere else you would want to use fancy text. Another image manipulation script that I think is incredible is the “Old Photo” script. Basically, this takes an image and converts it to look like an old black and sepia photo, including adding fading, stains, and other “features” that create a truly stunning effect. I really don’t know if Photoshop has anything like it, but it’s worth the effort of installing GIMP for this feature alone (see Figures 5-9).
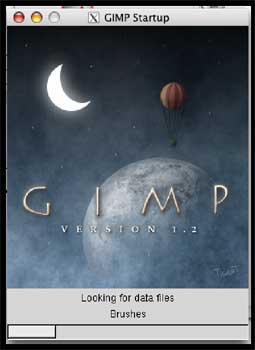
Figure 5. GIMP Splash Screen

Figure 6. GIMP File|Open dialog
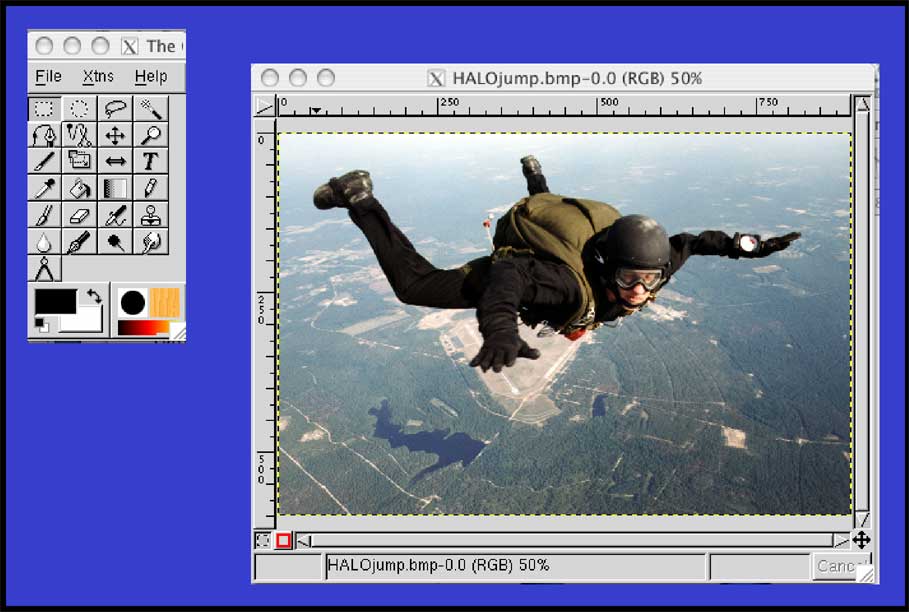
Figure 7. GIMP with an image open

Figure 8. Selecting the GIMP “Old Photo” script

Figure 9. Final result of the “Old Photo” script
Python. Python is a great scripting language – it’s easy to learn, powerful, embeddable, platform independent, and all the other great things that make a scripting language useful. Python comes preinstalled with Mac OS X, but without its standard GUI toolkit Tk (Tk, and its parent language TCL are the basis of a whole other article). I have been writing small applications in Python for about three years now, and while the command line scripts work fine with the installed version, none of the GUI programs run on the standard Mac OS X version. Again, a simple “fink install python” will install a version of python that allows me to run any of the GUI applications that I have written (again, Python could be another article).
Terminals. Yes, Mac OS X comes with a perfectly useable terminal program, but X11 based applications, including GIMP and the GUI version of Python, need additional text in the command line from the standard Mac OS X Terminal to run in X11. An easier method is to launch an application from an X11 based terminal. The Apple X11 package comes with a terminal application (called “term”) that can be launched from the menu line by clicking on the X11 icon in the dock and selecting “Terminal” from the “Applications” menu. Once you have term running, executing an X11 based application is as easy as typing “gimp” into the command line. I use an AppleScript script to launch term (as well as the other applications) from a button in Finder or the Dock.
Emacs. Emacs, which stands for “extendable macros” is a way of life for many Linux types. Created by the Free Software guru Richard M. Stallman, it is a text editor, calendar, diary, E-mail program, and even a psychoanalyst! And that doesn’t scratch the surface of this incredible piece of software. I use it as an editor for Python – it has revision control, text highlighting and can run Python scripts in a buffer (a workspace within the Emacs environment). I also use the emacs-wiki mode (yet another topic) as a place to keep notes on a variety of subjects.
(Editor’s note: emacs is also available in Mac OS X without using fink. For more information, go into terminal and type:
man emacs
for help)

Figure 10. Emacs
While this barely scratched the surface of fink and ported Linux software, I hope that it will encourage a few Mac OS X users to try a new area of computing. By installing a few simple packages, you have access to hundreds of applications that have been ported from the Linux world. Try it, you may be surprised at what you find!
Jepsen Brian and Ernest E. Rothman, Mac OS X for UNIX Geeks, O’Reilly & Associates, 2003. This book is absolutely essential for anyone who wants to learn about the cool/scary UNIX underpinnings in Mac OS X.
Apple’s X11:
http://www.apple.com/macosx/x11
Fink:
http://fink.sourceforge.net
FinkCommander
http://finkcommander.sourceforge.net
GIMP:
http://www.gimp.org
Python:
http://www.python.org
Emacs:
http://www.gnu.org/emacs